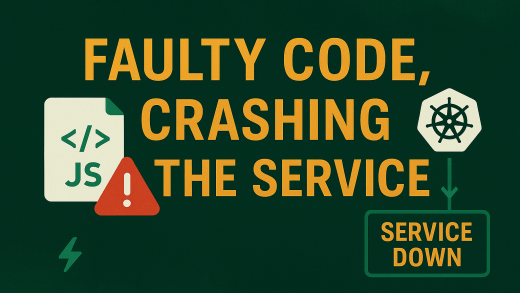
Problem
Are you utilizing git integration in your Orchestrator and striving to enforce the practice of developers pushing code solely from the Dev orchestrator? It can be frustrating when this process is not consistently followed.
Solution
If you’re looking for a positive resolution, a straightforward approach to this issue involves restricting code pushes exclusively to designated DEV Orchestrators, while preventing pushes from non-DEV sources. Let’s delve into the process of achieving this by managing the permissions of the account utilized for git integration within the Orchestrator.

Setup
The process will remain consistent across various Version Control tools, such as GitHub, GitLab, Bitbucket, and others. The concept is to utilize two different access tokens: one for DEV orchestrators and one for non-DEV orchestrators.
For this demo, I am using CeXP Orchestrator 8.16.0 and GitLab Enterprise. The process to setup a git repo in Orchestrator is provided here.
In GitLab, to create a project access token, you can do the following:
- Log in to GitLab.
- Select Search or go to and find your project which is registered in Orchestrator.
- Select Settings > Access Tokens.
- Select Add new token.
- Enter a name. (use an identifier to differentiate dev and non-dev)
- Enter an expiry date for the token.
- Select the desired scopes. (read & write for dev and read-only for non-dev)
- Click the Create project access token button.

Here, you can notice the scope is read_repository and write_repository for DEV orchestrator token. Note, this scope will be different for different VCS tools. Once, you create tokens, it should look like this.

Time to test
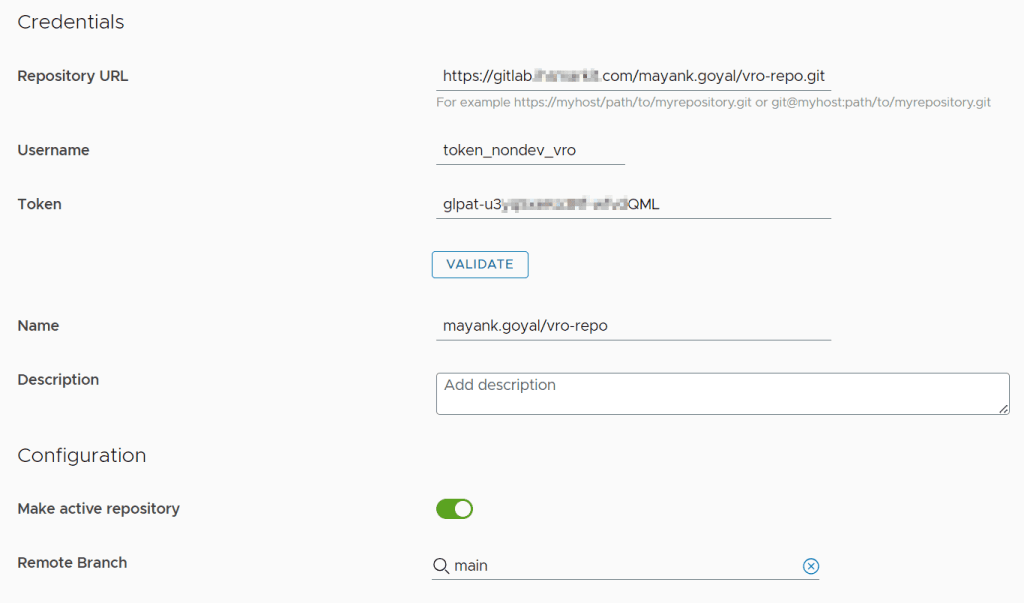
Lets put the non-dev token in your non-dev Orchestrator and validate and save it.
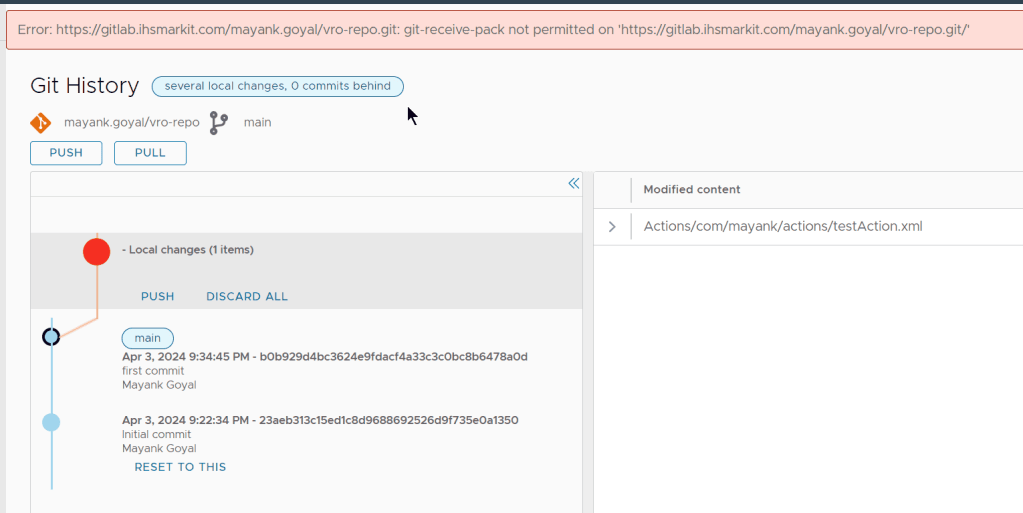
Now, make a change and try to push it.

✅ It will fail as intended. You will notice an error like git-receive-pack not permitted or push not permitted.
General Practices for branching and release
Branches and Naming convention
- trunk or mainline : It should be the default branch of repository integrating all changes for future releases. (example : master, develop or main)
- release branch : to create a release( example : release/v1.0, release/v1.1,etc)
- feature branch : to work on an issue( example : ticket-200, ticket-201, etc)
A. How to start work on an issue?
- Developer has to create an issue branch of the main branch(master or develop)
- Developer commit the changes into the issue branch(feature branch).
- Create a Pull Request against the default branch. Do code review etc. At this point you have to remove the unnecessary debugging code/logging etc. Let the CD process and code review process complete. Then merge it into default branch.
B. How to make a release? When source code in the main branch(default branch) reaches a stable point, a release branch is created. And the release build is deployed in your staging environment for testing.
Discover more from Cloud Blogger
Subscribe to get the latest posts sent to your email.