There are three main approaches for using Polyglot scripts in vRealize Orchestrator (vRO):
- Native Libraries: Using Runtimes and their native libraries. Tutorial here.
- Zip bundles: Using external libraries with your code as a zip package which will be see in this post.
- Action Environments: Using npm, pip or PSGallery packages or even internally hosted packages as a external library to your code. Tutorial here.
Introduction
We all know that Aria Automation Orchestrator 8.8 onwards, we can create script environments for Python, NodeJS and PowerShell languages that basically reduces the amount of work needed to load and run a custom module based script in vRO as you just have to pass the module name and version and it will auto-download everything for you.
However, Because not everyone is using 8.8 yet and even some may still want to use this bundle mechanism in later versions, in this post, we will see the exact steps on how to import a custom python module (for eg. datetime) in vRO using a Windows machine. One other reason for this post are the number and sequence of steps to follow to make it work, I almost always get befuddled 😕, you know.
Tools needed
You can use any tools of your choice for the below mentioned category. I have shared what I’ve used.
- Code Editor: Visual Studio Code
- File Zipper: 7-Zip
- vRO (of course)
- Python 3.7+
- pip module
Steps
- Open cmd.exe and go to
Desktoplocation (usingcd .\Desktop) and create a working directory for this project (eg.vro-python) and a sub-directory (lib) using the command
mkdir vro-python
cd vro-python
mkdir lib
Working directory can have any name but there must be a folder with the name lib inside it which will be used to store python modules.
- Install any python module of your choice (here
datetime) inside lib directory. You can install multiple modules if you want.
pip install --target=C:\Users\mayank\Desktop\vro_python\lib datetime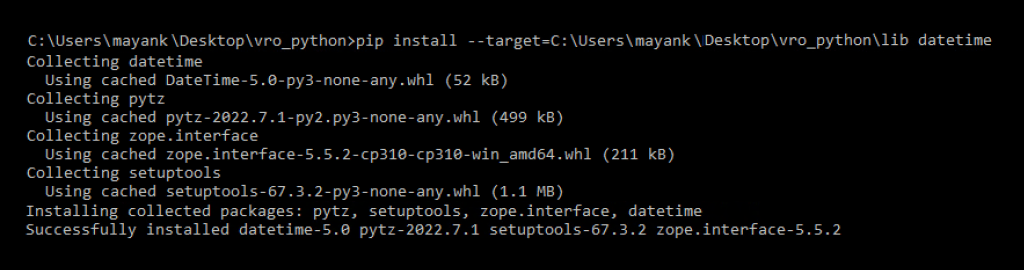
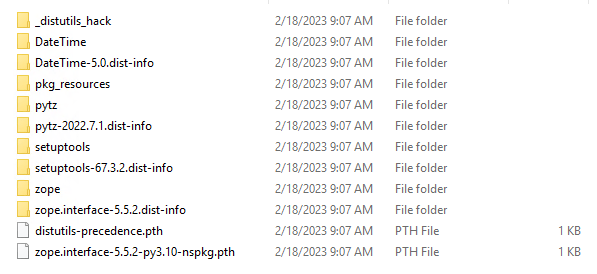
- Once the module is installed, you can verify it by going to
libdirectory.
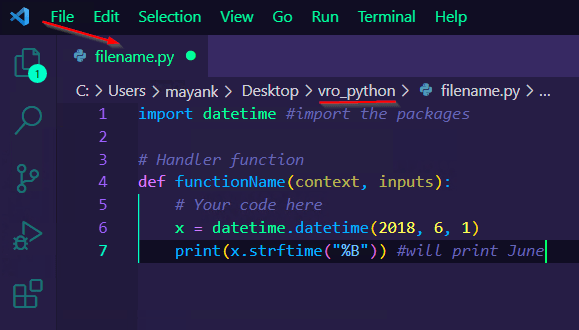
- Now, Open VSC and let’s write script that will be using the module that we’ve installed (here
datetime).
import datetime #import the packages

# Handler function
def functionName(context, inputs):
    # Your code here
    x = datetime.datetime(2018, 6, 1)
print(x.strftime("%B")) #will print June- Save it as filename.py just outside of
libfolder, which means in our case insidevro-pythonfolder.
You are free to use any name for the filename like main.py and for function like handler. Make sure what name you are using for {{filename.py}} and the handler function {{functionName}} because these will be used inside Entry handler in vRO in later steps.
- Once, you are satisfied with what modules and what scripts you want to put in vRO, it is time to bundle them. For that, we can use 7-Zip tool. Go inside the working directory (vro-python) and select all (
Ctrl+A) and Select Add to “vro-python.zip” or any name for that matter.

- Time to upload it to vRO. Login to vRO, Goto Library -> Actions.
- Create a new action. On the General Tab, enter a name, module, and version number for the action. You are free to use any name for your action.

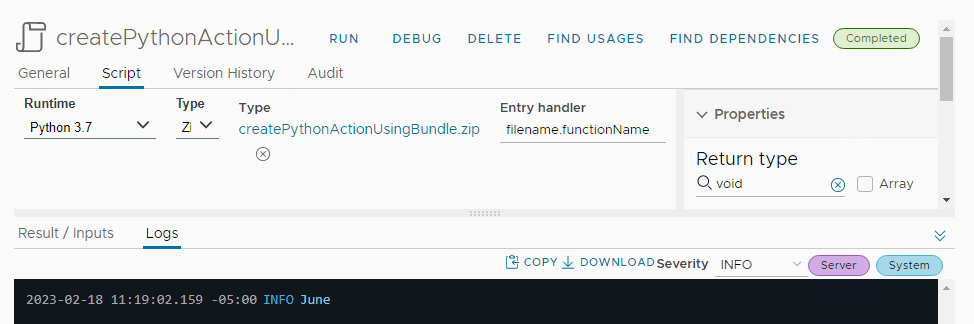
- Select Runtime as Python 3.7, Type as Zip and Click Import and select your zip package. In the Entry handler, fill it with {{filename}}.{{functionName}}.
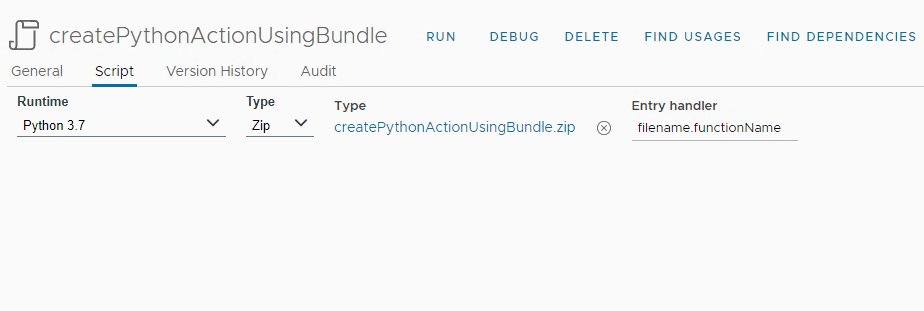
- Save your action and click Run. You should see the desired output.
Final Note
This tutorial will help you get started with custom modules, however, if you want to provide inputs and outputs to this action, additional steps need to be followed which are intentionally put out-of-scope in this article. Also, if the size of modules are larger than usual, probably you need to increase the Memory Limit and Timeout. However, you can go through the References for more help.
I would also like to share a quick note on what things we have considered while creating our own custom scripts.
| Entity | Variable | Remark |
|---|---|---|
| Working Directory name | User-defined | Could be anything (here vro-python) |
| Sub-directory name | Fixed | Has to be lib |
| Script file name | User-defined | Could be anything like main.py but has to be used exactly the same in Event handler. |
| Function Name | User-defined | Could be anything like handler but has to be used exactly the same in Event handler |
| vRO Action Name | User-defined | Could be anything. But may follow camelCasing |
| Package Name (.zip) | User-defined | Could be anything but will be auto-renamed to match the action name automatically once you import it. |
Discover more from Cloud Blogger
Subscribe to get the latest posts sent to your email.


[…] Zip Bundles: Run a Custom Python Script in vRO. […]
[…] Zip bundles: Using external libraries with your code as a zip package. Tutorial here. […]