In this post, the idea is to trigger a workflow from a vRO to another vRO over the REST API dynamically (no need to add the remote vRO as Inventory REST Host as we will be using transient hosts, you must have guessed). I have created a WF that you can use to get that functionality. Link to the package here.
Approach
There are multiple scenarios where we have to trigger a vRO workflow from another workflow. And for that, depending on the scope and requirement, We have 3 basic approaches to this.
Trigger WF in same vRO
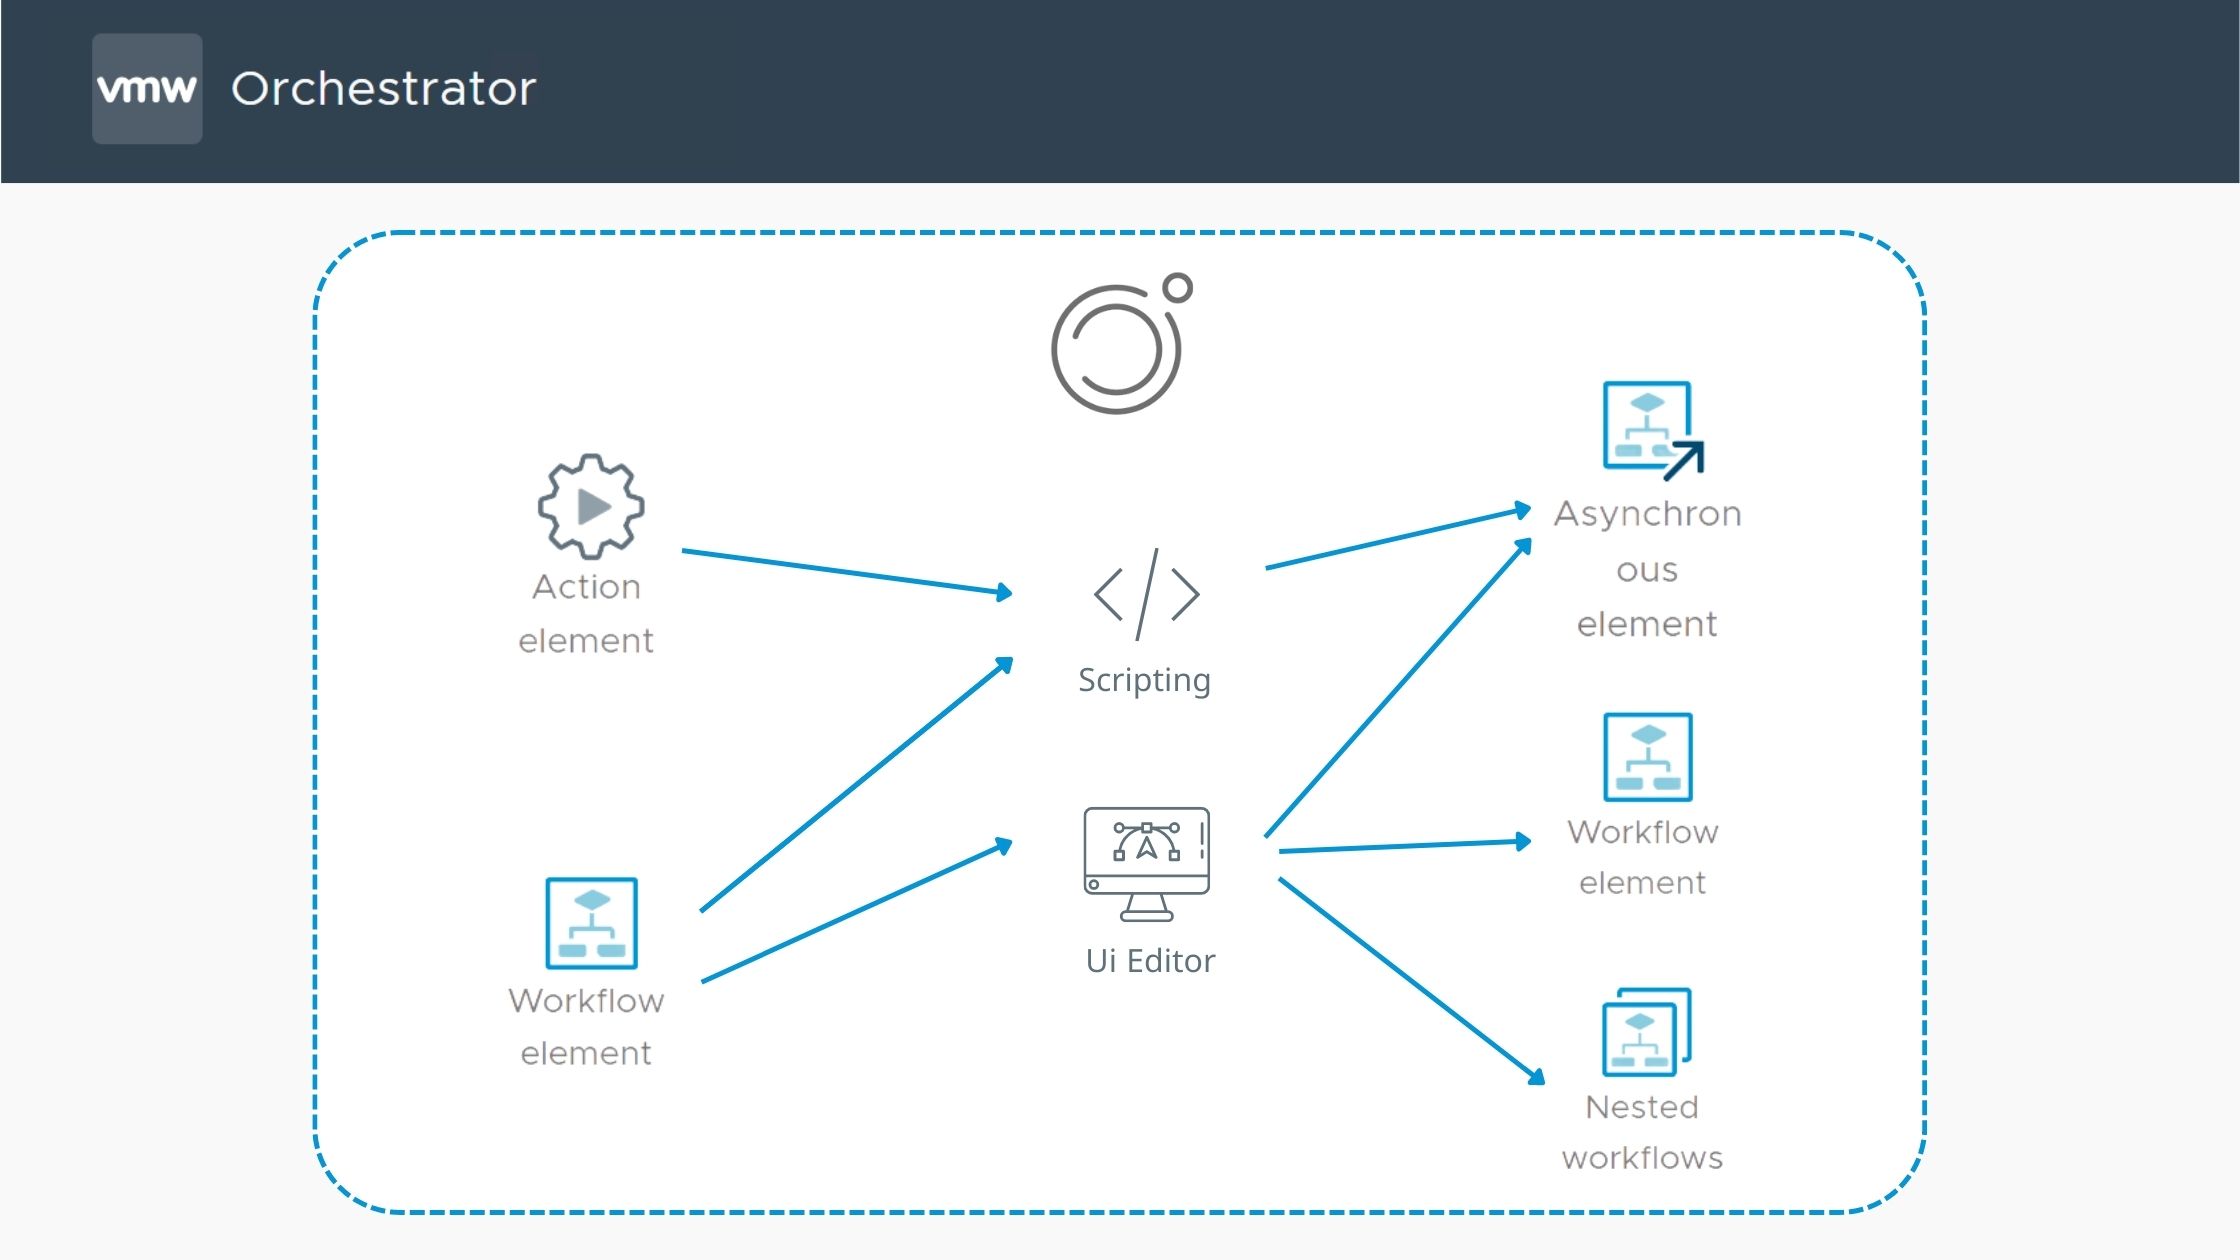
This one is most commonly used through the Workflow editor. What you have to do is to simply add a WF item from the Generic Tab in the WF editor inside another WF. You can then will be able to run the WF synchronously (means the WF will wait for the sub-WF to execute completely and return its status) or asynchronously (that means the WF will run in a different thread and will not return the execution result).
If you want to run a workflow through action, you can also do that using this script in a asynchronous manner. Learn more about it in a post by Umit Demirtas here.
//Auto generated script, cannot be modified !
var workflowToLaunch = Server.getWorkflowWithId("d7c058fb-3f95-4d92-ad17-5d6a856343d4");
if (workflowToLaunch == null) {
	throw "Workflow not found";
}
var workflowParameters = new Properties();
workflowParameters.put("input1",input1Value);
workflowParameters.put("input2",input2Value);
//Add all the inputs needed..//
wfToken = workflowToLaunch.execute(workflowParameters); Trigger WF in Master-Slave setup using Multi-Node Plugin
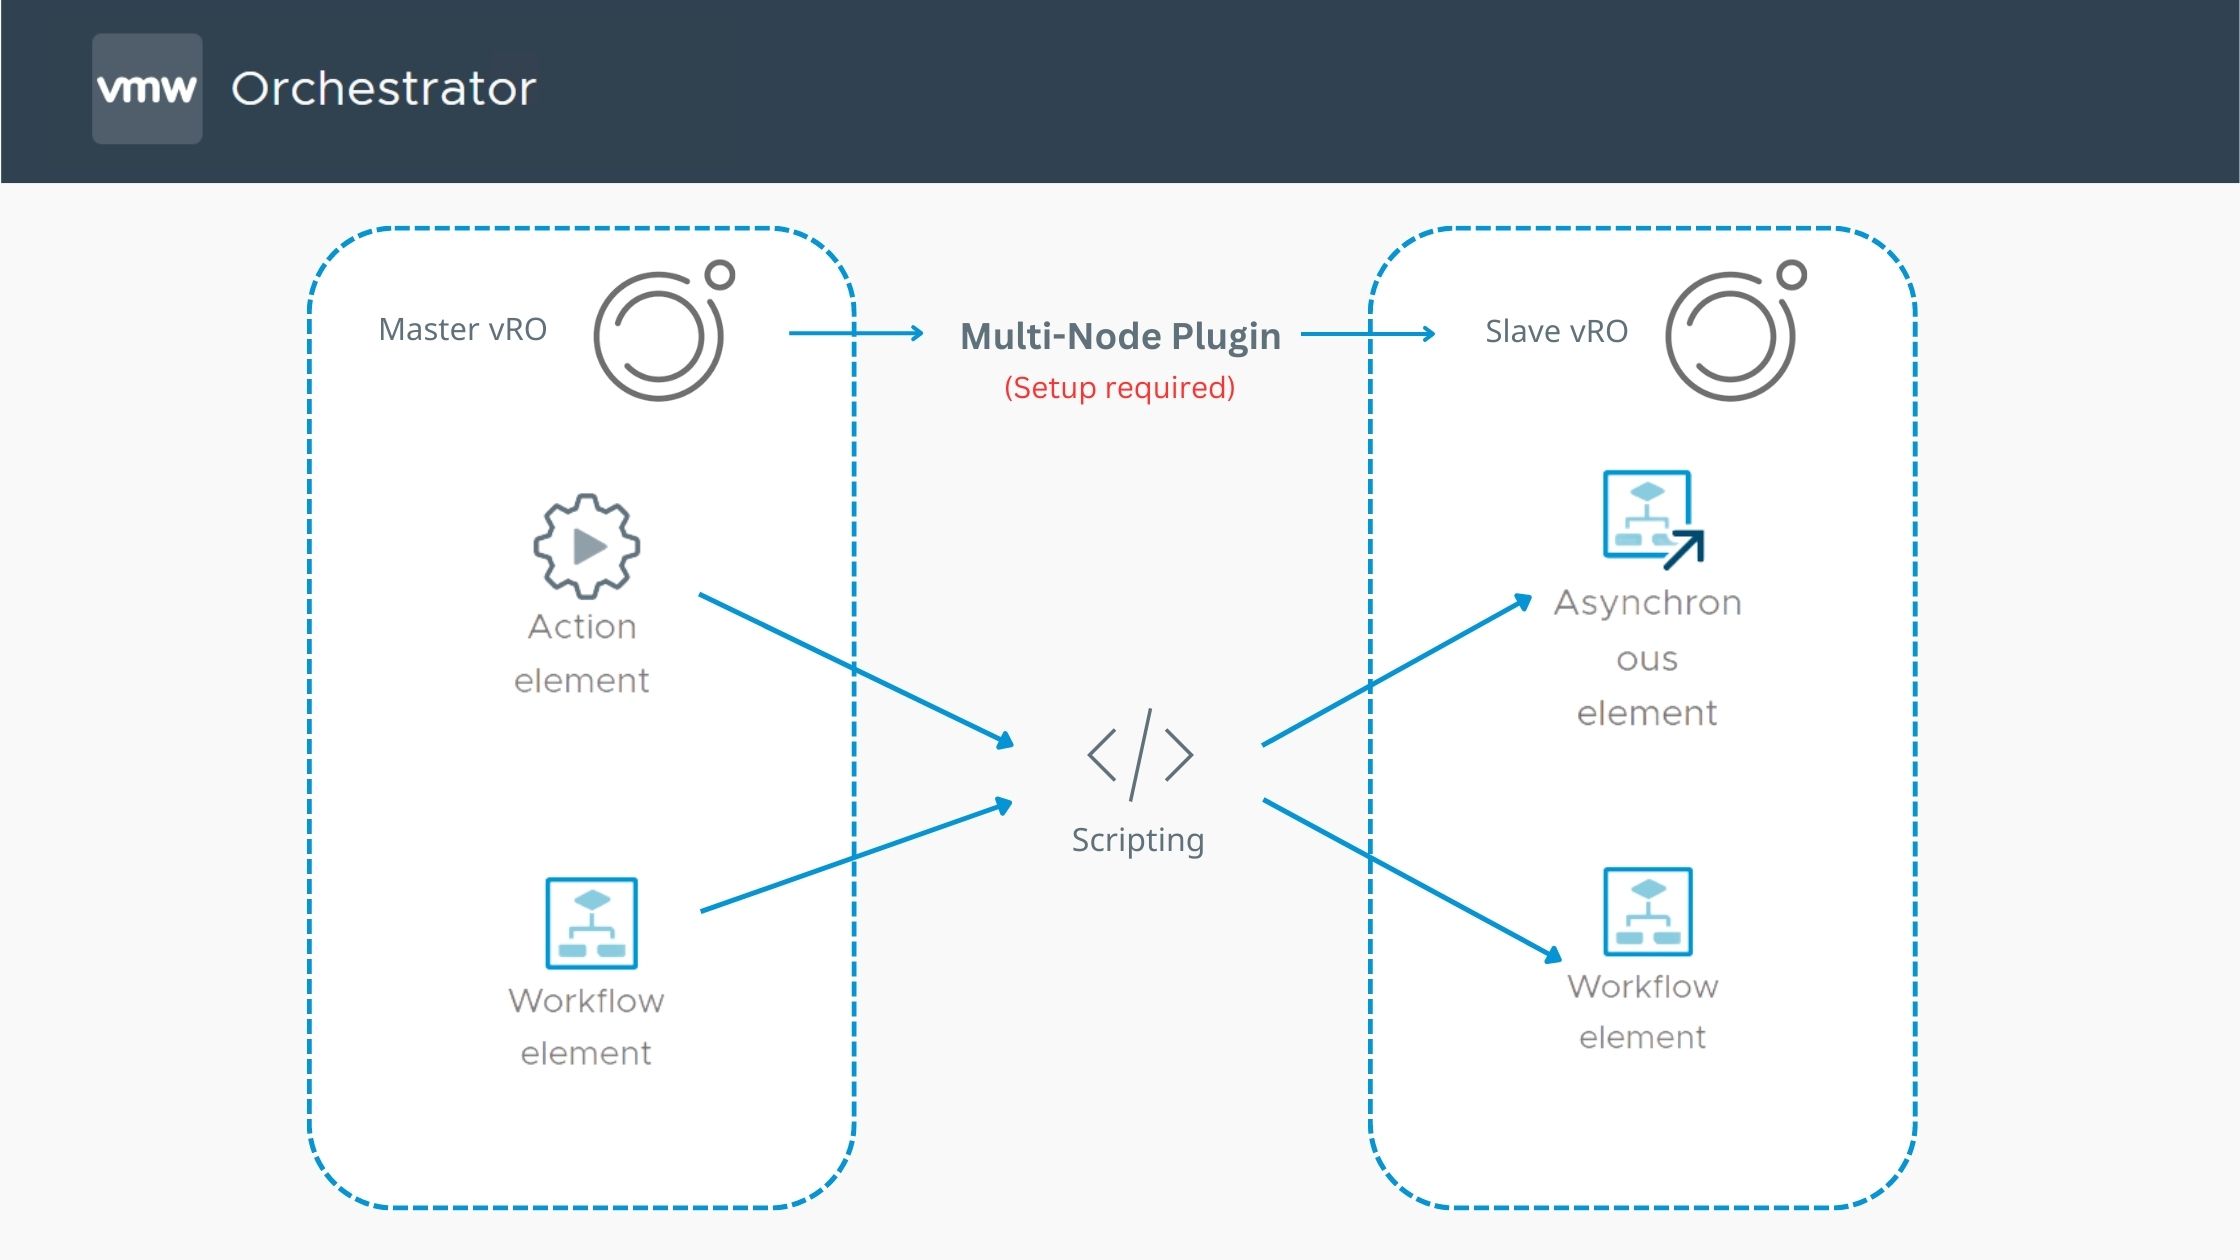
The Multi-Node plug-in creates a primary-secondary relation between vRealize Orchestrator servers, which extends in the areas of package management and workflow execution. This plugin comes with vRO out-of-the-box. Learn how to setup Multi-Node plug-in here .
A typical script to trigger a WF in a proxy vRO Server synchronously.
// Id can be viewed in the scripting of the proxy workflows generated for a server
var workflowId = "BD808080808080808080808080808080F0C280800122528313869552e41805bb1";
var tokens = [];
for(var i = 0; i < servers.length; i++) {
	var parameters = new Properties();
	parameters.put("vm", vms[i].id);
	parameters.put("newName", newNames[i]);
	var tmpResult = VCOProxyWorkflowManager.executeSynchronousProxy(servers[i].connectionId, workflowId, parameters);
	tokens.push(tmpResult.get("remoteToken"));
}
Other way would be to trigger them asynchronously. Make sure the proxy workflows exists in local vRO server. Learn more about that here.
VCOProxyWorkflowManager.executeAsynchronousProxies(workflowId, params);Trigger WF using Transient REST Host mechanism

This one is what I would like to share in today’s post. I have created a custom WF through which you can use this approach. Basically, the idea is to utilize the vRO REST API to trigger workflows asynchronously (workflows/{{workflowId}}/executions) and that too using the transient REST host which will not require any configuration to be done earlier. You just need the HTTP-REST plug-in that comes out-of-the-box.
Steps
Manually run the WF(to be triggered) just once
As you can see above, I have modified the sequence of steps. I have actually created a new action that will prepare the input parameter JSON body by itself. You will find that action (in.co.cloudblogger.customclasses/getWorkflowLastExecutionBody()) in the package itself.
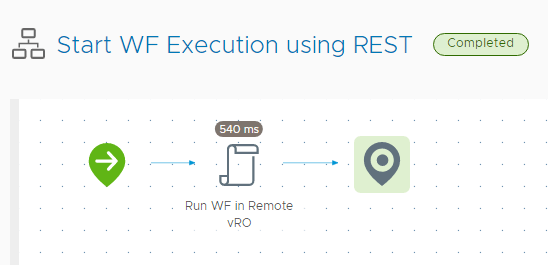
Just 1 thing is needed to be done which is to run the WF to be triggered at least once manually. So that a JSON structure will prepared for the input set of the triggered WF and the action I have created will fetch the last run and automatically prepopulate the “Start WF Execution using REST” WF with the input set of last run.

ProTip If you are finding issues in getting the parameter body (expected in JSON), one other way is to use the Network Chrome inspector when kicking off a sample workflow from the vRO HTML5 client and grabbing the parameter JSON.
Trigger it remotely
- Download the vRO package from here.
- Once the package is imported, Go to the Workflow “Start WF Execution using REST” which will be considered as “master wf” here.
- Provide inputs to this workflow
- vRO FQDN – Name of the remote vRO where you want to trigger the WF.
- Username – Username to access remote vRO (User should have permission to Run)
- Password – Password for the user provided
- Workflow ID – ID of the Workflow that you want to trigger (find it in your WF URL)
- Parameter JSON – A structured JSON object with input parameters required to run the remote WF. This will be auto-populated using the new action.
- Click Run

Important Values of Certain Datatypes like SecureString or EncryptedString will be hidden in the Payload body. You will have to manually add that missing JSON. For eg. if you see here, the payload has no value field for SecureString.
{
   "parameters":[
      {
         "value":{
            "string":{
               "value":"mayank.goyal"
            }
         },
         "type":"string",
         "name":"username",
         "scope":"local"
      },
      {
         "type":"SecureString",
         "name":"password",
         "scope":"local"
      }
   ]
}To fix this, you can add something like,
"value":{
            "string":{
               "value":"pa$$w0rd!"
            }
},to make the final payload complete to be sent over REST.
{
   "parameters":[
      {
         "value":{
            "string":{
               "value":"mayank.goyal"
            }
         },
         "type":"string",
         "name":"username",
         "scope":"local"
      },
      {
	"value":{
            "string":{
               "value":"Mar#2023"
            }
         },
         "type":"SecureString",
         "name":"password",
         "scope":"local"
      }
   ]
}- Once the master WF executed successfully, Login to remote vRO.
- Go to the WF that was triggered by master WF, click ALL RUNS, you should see the executed run there.
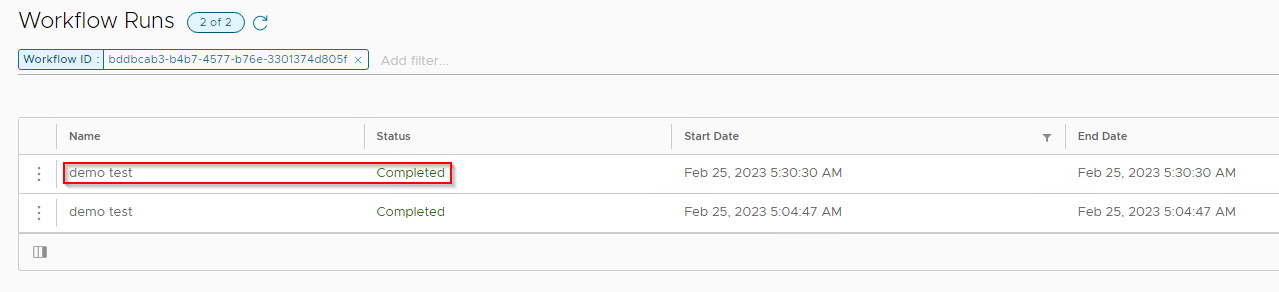
- In our test run, we passed the Input value as “Triggered over REST by Mayank Goyal” which can be validated here.

You can use this WF inside a Wrapper WF to prepare the inputs or probably inside another WF where you are performing other tasks and that way, you can use it in your automations easily.
That’s it in this post. I hope it will be of some help for you. Thanks for reading. See you on other post. Please subscribe to my newsletter and get latest posts directly in your inbox.
Discover more from Cloud Blogger
Subscribe to get the latest posts sent to your email.