To use bots in Google Chat, you must use a work or school account.
Objective
How about building a Chatbot that brings your vRealize Orchestrator services and resources right into Google Chat, letting users get vital bits of information without leaving the conversation. That would be great, right? Why Chat you may ask if you already have Gmail? I would say because Chat is more intuitive, simple, integrated and fun-to-watch😉. And it doesn’t require any SMTP configuration to be done in vRO.
Potential Use-cases
- Notifications of successful Workflow Executions on Google Chat Team Spaces
- Error Notifications and auto-assignments to team member using @mention
- Daily Reports and Validations on Team Spaces
- and so many possibilities…
Tutorial
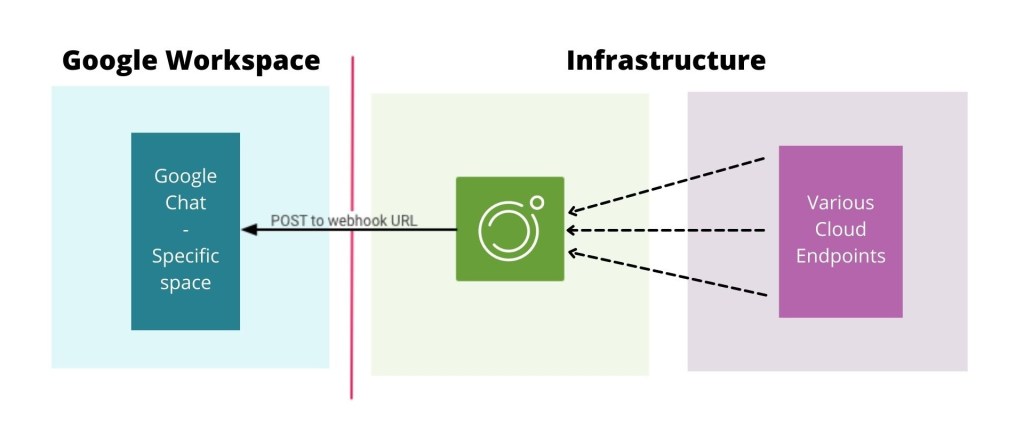
Incoming webhooks let you send asynchronous messages into Google Chat from applications that aren’t bots themselves. For example, you can configure vRealize Orchestrator to notify personnel on Google Chat when a particular server goes down. Incoming webhooks serve as a quick and easy way to integrate with existing workflows such as these without the overhead of writing entire bot applications. This is the path for low-effort integrations that provide information feeds or alerts. Let’s dive into the whole process of building a chatbot using webhooks that triggers via vRealize Orchestrator.
Step 1: Register the incoming webhook
- Open Google Chat in your browser.
- Create a new space or Go to the space to which you want to add a bot.
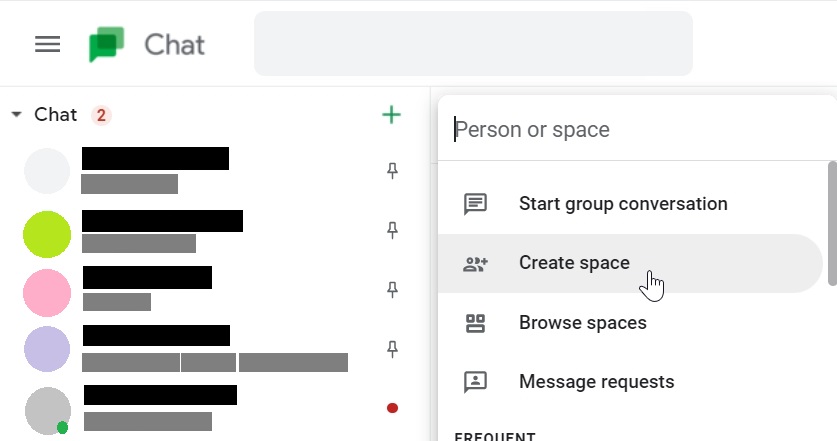
- From the menu at the top of the page, select Manage webhooks.

- Under Incoming Webhooks, name the new webhook ‘vRO Notifications’ and provide an avatar URL, click SAVE.
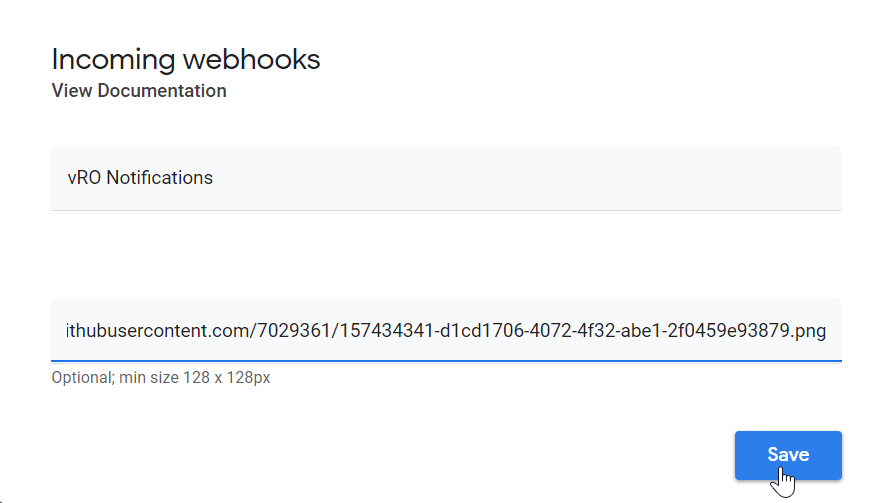
Get the 128x128px avatar for your bot here.
- Copy the URL listed next to your new webhook and keep it handy. We will use it later on.

- Click outside the dialog box to close.
Step 2: Import the Node.js script action in vRO
- Download the vRO package from here.

- Import this package in your vRO.
- Check action named
sendNotificationsToGoogleChat. This action will be used to send notifications to Google Chat.
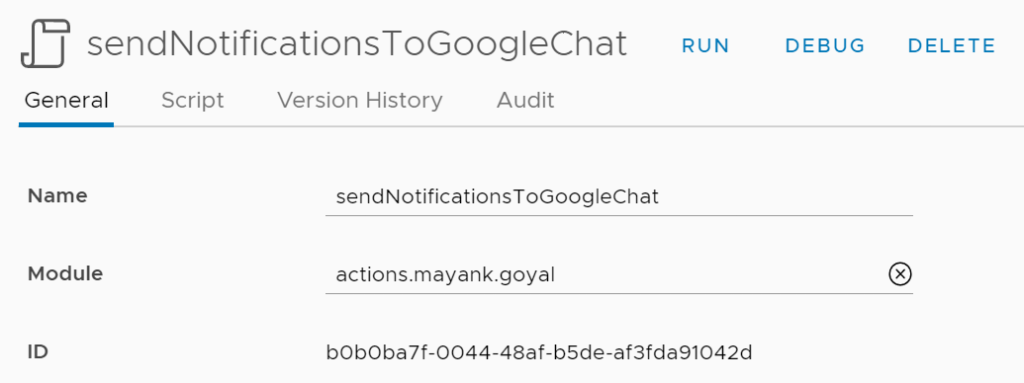
- Run the action and pass webhookURL without
https://chat.googleapis.com

If everything is OK, you should see this message in your space.

Step 3: Use sendNotificationsToGoogleChat action in Workflows
To utilize this action, we have to attach it in workflows for automatic notifications. Let’s take a scenario where we want to notify the team when the workflow is failed.
- Create a new workflow Demo Workflow – Chatbot and add a scriptable task that will fail.
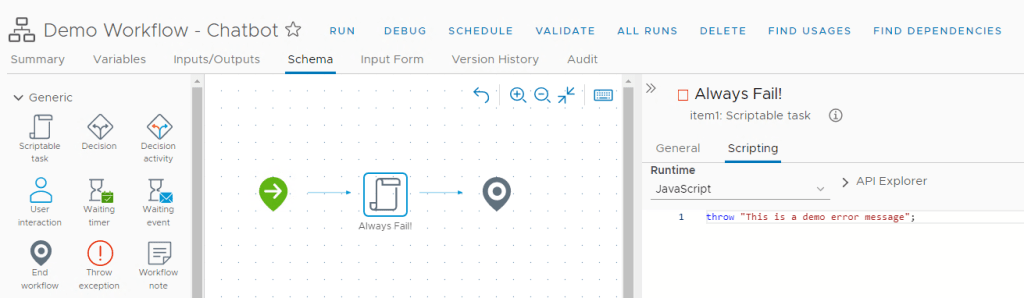
- Add a Default error handler item and an scriptable task and the action sendNotificationsToGoogleChat.

- In this new scriptable task, copy-paste this JS script with webhookPath that you have copied from your space.
webhookPath = "/v1/spaces/........";
message = "Important message for <users/all>: The workflow *";
message += workflow.rootWorkflow.name;
message += "* has been failed";- Add a error variable and add it to Exception Handling in all the workflow items

- Time to run, Click Run and wait for it to fail.
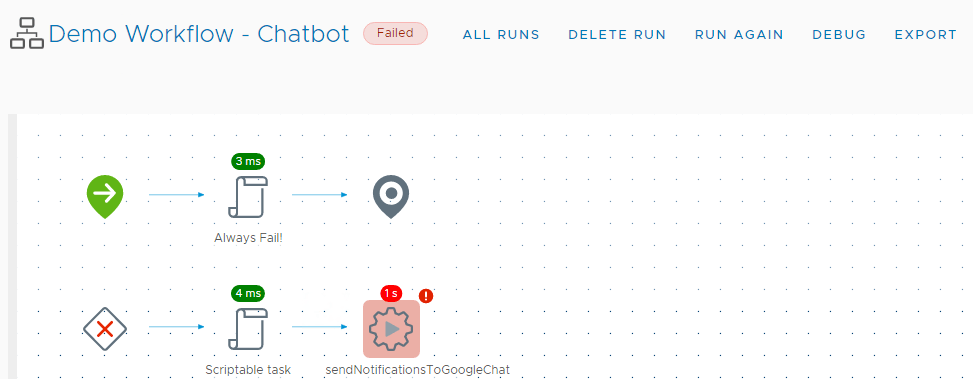
- Check your space. There should receive a message.

Tip Find this workflow in the package for testing purposes.
Limits and considerations
As you configure webhooks, take note of these limits and considerations:
- If only select organizational units (OUs) in your domain have bots enabled, incoming webhooks created in a space will fail with the following error:
{
  "error": {
    "code": 403,
    "message": "The caller does not have permission",
    "status": "PERMISSION_DENIED"
  }
}- Incoming webhooks do work in direct messages, but only when all users have bots enabled.
- Because Manage webhooks is only available from a web browser, webhooks must be set up from the Chat web app. Webhooks are not configurable from the Chat mobile app.
Text Message Formatting Guide
This section describes how to create simple messages that appear inline as if typed by a user. The is basically the message that we are passing to our vRO action.
Basic unformatted messages
Any message in Google Chat is represented as a JSON object. A basic message that specifies just a simple plaintext body could look like the following:
{ 'text': 'Your workflow "Create Egde Gateway" has successfully executed'}If posted into Google Chat (e.g. via incoming webhooks), it would look like the following:

Using formatted text in messages
Google Chat lets you add basic formatting to the message text, including bold, italic, and strikethrough. To format text, wrap it with the following symbols:
| Format | Symbol | Example | Result |
|---|---|---|---|
| Bold | * | *hello* | hello |
| Italic | _ (underscore) | _hello_ | hello |
| Strikethrough | ~ | ~hello~ | |
| Monospace | ` (backquote) | `hello` | hello |
| Monospace block | “` (three backquotes) | “` Hello World “` | Hello |
For example, consider the following JSON:
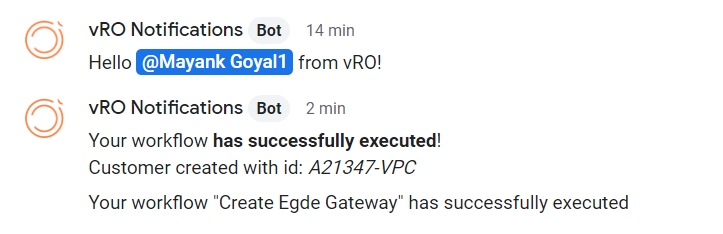
{'text' : 'Your workflow *has successfully executed*!\nCustomer created with id: _A21347-VPC_'}This places a message like this into the Chat space:

Including links in message text
If you include a plain link URL in your message text, such as http://example.com/foo, Google Chat uses this as the link text and automatically hyperlinks that text to the specified URL.
To provide alternate link text for your link, use the following syntax:
| Syntax | Rendering |
|---|---|
<https://cloudblogger.co.in|my link text> | my link text |
The pipe and link text are optional, so that <https://example.com/foo> and https://example.com/foo are equivalent.
Messages that @mention specific users
A bot can @mention a user in a message, providing the user ID in the following syntax:
<users/USER_ID>
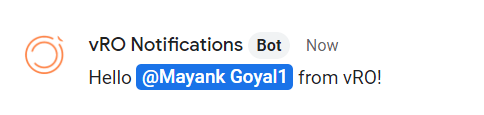
This string will be substituted with an @mention of the specified user. For example, consider the following JSON:
{"text": "Hello <users/113352777658254482749> from vRO!}This payload would produce a result like the following:
To determine the USER_ID for a user, In Google Chrome, Click ![]()
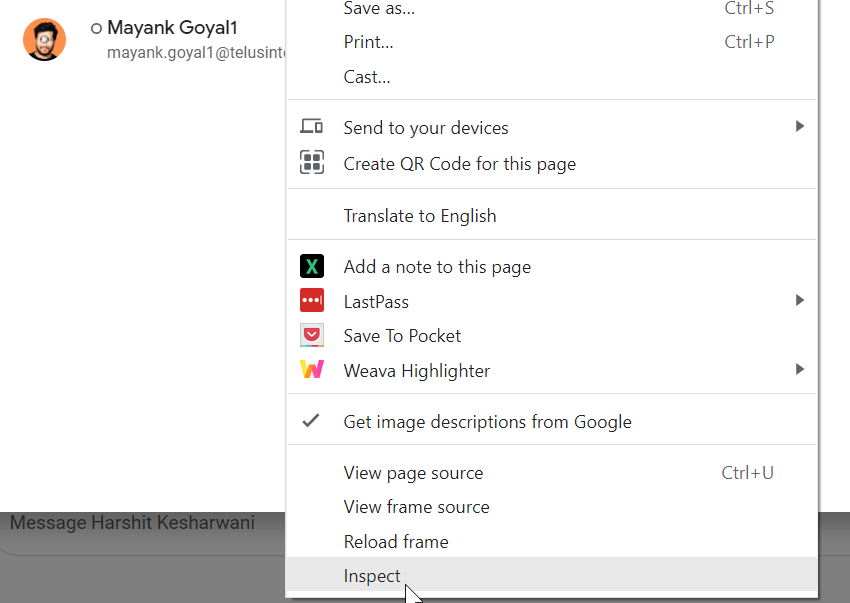
and Click Inspect on the chat page, and point out to the user,

you will get the USER-ID as data-member-id as shown here.
Change user/human/113352777658254482749 to users/113352777658254482749 while pasting it into your code.

Messages that @mention all users
You can use the special user ID all to @mention all the human users in a space. For example:
{"text": "Important message for <users/all>: Code freeze starts at midnight tonight!"}Future Scope: Card messages
Google Chat supports more complex UIs in the form of cards that can give much more insights of our infrastructure.
A simple example card:

Discover more from Cloud Blogger
Subscribe to get the latest posts sent to your email.


i tried to build a card layout chat message with webhook, but getting errors i think card layouts are not supported in webhook.
will check.
Hi! I put this package in my vRO and say some like “polyglot” error… do you can write the code in only basic lenguage of programation… i understand “polyglot” need more licences. Thanks in advance.
You can take reference from here. https://cloudblogger.co.in/2024/04/08/orchestrator-workflow-to-notify-ms-teams-channel-cb10134/